
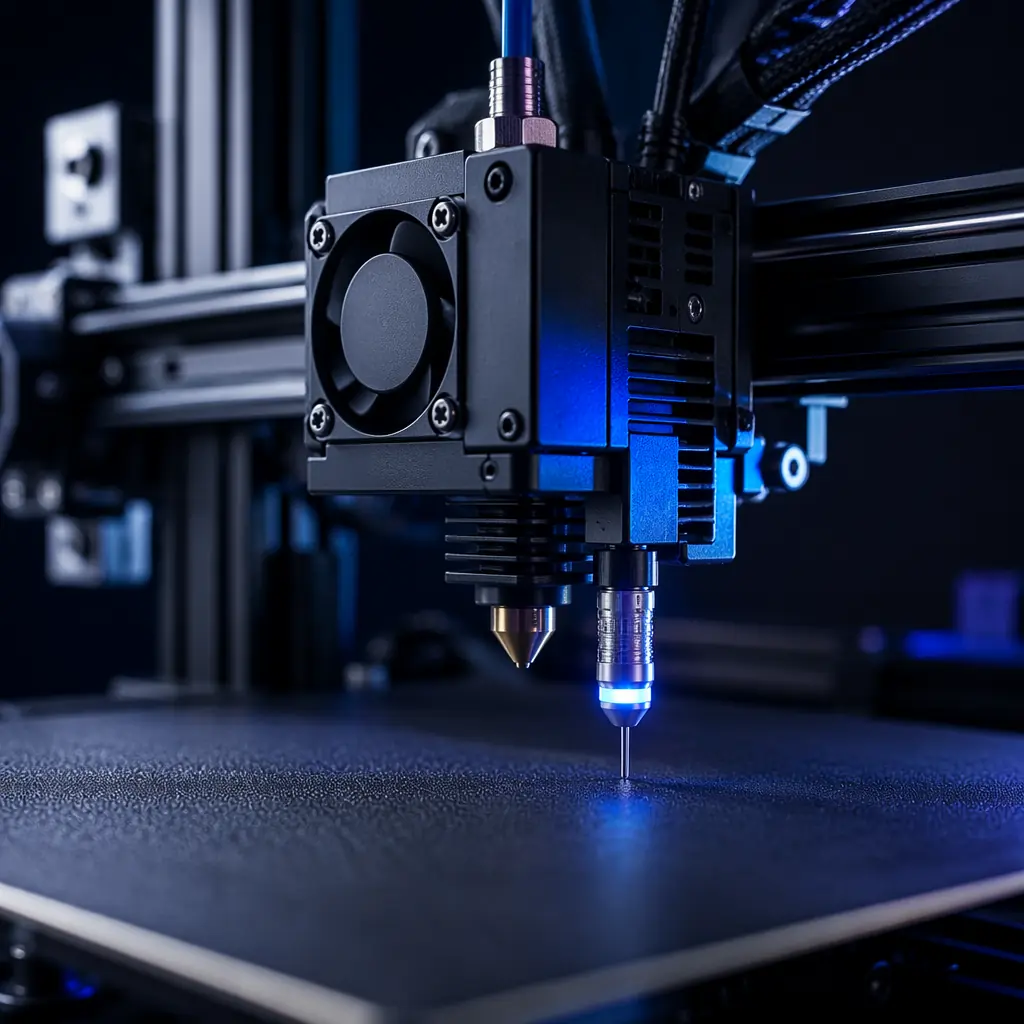
Returns are the silent killer of distribution margins. And in 3D printing, the #1 reason a printer gets returned is not a broken motor or a failed power supply — it's a bad first layer. A customer who can't get the first layer to stick will blame the printer, not their technique. They'll return it, leave a bad review, or — worst of all — tell their community that 3D printing is "too complicated." The component that prevents this scenario more than any other is the auto bed leveling probe. Understanding the four probe technologies on the market — and which customer segments each one serves — is one of the highest-leverage product knowledge investments a distributor can make.
What Auto Bed Leveling Actually Corrects — and What It Doesn't
The name is misleading. Auto bed leveling doesn't physically level the bed. It doesn't turn any screws, and it doesn't compensate for a printer frame that's assembled 3° out of square. What ABL does is measure the topography of the build surface and adjust the Z-axis in real time during the first few layers so the nozzle stays at a consistent distance from the bed regardless of warps, dips, or tilt. Think of it as a dynamic offset map, not a leveling mechanism.
A probe takes a grid of measurements — typically 9 to 49 points — across the build plate before each print. The firmware stores these as a height map. During the first layer, the Z stepper motor makes micro-adjustments at each XY position based on that map. The result: a nozzle that follows the actual bed surface rather than assuming it's perfectly flat. This is why a printer with ABL can produce a flawless first layer on a bed that's visibly warped by 0.3mm, while a manual-leveling printer on the same bed will show uneven squish or outright adhesion failure in the low spots.
What ABL cannot fix: a severely tilted bed (more than ~2mm of slope across the surface), a loose gantry, or a Z-offset set incorrectly. These are mechanical issues that no probe can compensate for. This distinction matters because when a customer says "auto leveling isn't working," the root cause is almost always one of these three mechanical faults — not the probe itself. A distributor who can diagnose this over a 5-minute call prevents a return. Our maintenance guide for distributors covers the full diagnostic workflow.
The Four Probe Technologies Compared
Not all probes are created equal. The technology inside the sensor determines accuracy, repeatability, speed, and — critically — whether the probe works on all bed surfaces or only specific materials. Here is how each type works and what it means for your customers.
Mechanical plunger probes (BLTouch, CR Touch, 3D Touch):
The workhorse of the consumer 3D printing world. A solenoid extends a plastic pin that physically contacts the bed, retracts on touch, and triggers an optical or Hall-effect sensor at a precise retraction point. Because the probe makes physical contact, it works on any bed surface — glass, PEI, textured steel, BuildTak, G10, you name it. The BLTouch's repeatability of ±0.005mm is more than sufficient for layer heights down to 0.08mm. This is the probe technology in the Precise3D Creator C1, which runs a 25-point mesh before each print and achieves first-layer success rates above 95% out of the box, as reflected in customer support data. The trade-off: the plastic pin is a consumable. After roughly 10,000 deployments — about 18 months of heavy use — the pin tip can wear and should be replaced. Replacement pins cost under $2 and take 30 seconds to swap.
Inductive probes (eddy current):
These sensors detect metal surfaces by generating an electromagnetic field and measuring changes in inductance as a metal target approaches. The advantage: no moving parts, nothing to wear out, and extremely fast probing — a 49-point mesh completes in under 30 seconds. The reason they appear on premium printers like the Prusa MK4 and XL is that inductive probing integrated into the load cell enables nozzle-tip-as-probe measurement, eliminating the Z-offset calibration step entirely. The disadvantage is that inductive probes only work on metal build plates. Put a glass bed or a thick BuildTak sheet on top of the metal, and the probe loses sensitivity — the readings become unreliable. This is why inductive is rare on entry-level printers, where users commonly swap bed surfaces.
Capacitive probes:
The budget option. These detect changes in capacitance as the probe approaches any surface — metal, glass, plastic. The problem: capacitance changes with temperature and humidity. A probe calibrated at 22°C in a workshop will read differently at 35°C after a 6-hour ABS print with a 110°C bed. The accuracy drift is typically ±0.05mm to ±0.1mm, which is enough to cause first-layer problems at layer heights below 0.15mm. Capacitive probes are adequate for printers in the sub-$199 segment where any ABL is better than no ABL, but they are the most common source of "auto leveling doesn't work" complaints. For the same bill-of-materials cost — roughly $3–5 — a clone mechanical probe (3D Touch) delivers significantly better real-world reliability.
Strain gauge and load cell systems:
The premium tier. A strain gauge measures the microscopic deformation of the print head mount when the nozzle makes contact with the bed. Because the nozzle itself is the probe, there is zero offset between the measurement point and the printing point — the system measures exactly where the nozzle tip is, not where a separate probe thinks it is. This eliminates the Z-offset variable that causes 90% of ABL-related support tickets on mechanical probe systems. Strain gauge systems achieve ±0.002mm repeatability and probe speeds of 100+ points in under 20 seconds. The Precise3D Pro X1 uses a 49-point mesh with a strain gauge integrated into the print head mount, enabling fully automatic calibration — the user presses "print" and never touches a knob. This is not a luxury feature; for customers printing engineering materials at 0.05mm layer heights, it's a mechanical requirement. Our kinematics comparison explains why CoreXY + strain gauge is the standard pairing for professional-grade printers.
Mesh Density: 9 Points vs 25 vs 49 — Does It Matter?
Yes, but not in the way most spec sheets suggest. A 3×3 grid (9 points) covers a 220×220mm build plate at 110mm spacing between measurement points. If the bed has a localized dip — say, a 0.1mm depression in the center from a manufacturing defect — a 9-point mesh will miss it entirely if the defect falls between grid points. The printer will print on that spot as if the bed were flat, and the first layer will show inconsistent squish in that region.
A 5×5 grid (25 points) at 55mm spacing catches most bed irregularities on plates up to 250mm. This is the practical minimum for reliable printing at layer heights below 0.15mm. The Precise3D Creator C1 uses a 25-point mesh, which is sufficient for the PLA/PETG/TPU materials in its target range — these materials have enough first-layer adhesion tolerance to handle any minor deviations between grid points.
A 7×7 grid (49 points) at ~37mm spacing is what the Pro X1 runs. At this density, no bed irregularity larger than 37mm can escape detection. For materials like ABS and Nylon — where first-layer adhesion is inherently weaker than PLA and any inconsistency causes warping that propagates upward through the entire print — this mesh density is not optional. The probing itself adds about 15 seconds compared to a 25-point mesh (49 points at 0.3s per probe = ~15 seconds), which is negligible against a multi-hour print.
The practical takeaway for distributors: mesh density should scale with the printer's intended material range. A PLA-only printer at $199 does fine with 9–16 points. A multi-material printer at $349+ should have at least 25. A professional printer handling engineering filaments should have 49 or more. If a manufacturer advertises a printer as "ABS-capable" but only includes a 9-point mesh, the enclosure and heated bed are solving half the problem — the other half is bed surface consistency that a sparse mesh can't compensate for. This connects directly to material compatibility, which we cover in depth in the engineering filaments guide.
Z-Offset: The One Setting That Causes 90% of First-Layer Failures
If ABL is the measurement system, Z-offset is the calibration constant that makes the measurement useful. Z-offset is the vertical distance between the probe's trigger point and the nozzle tip. If the probe triggers at Z=0 but the nozzle is physically 0.15mm above that point, the Z-offset must be set to -0.15mm for the printer to compensate correctly. Get this number wrong, and the ABL system faithfully adjusts the nozzle to hover 0.3mm above the bed everywhere — producing a first layer that looks perfect but peels off with a flick of a fingernail because there's zero squish.
The Z-offset workflow separates the four probe types into two categories:
Offset probes (mechanical, inductive, capacitive) require manual Z-offset calibration.
The user runs a test print, observes the squish of the first layer lines, and adjusts the Z-offset in 0.01mm increments until the lines are properly flattened against the bed. This is the single largest friction point in the new-user experience — it requires the user to understand what a correct first layer looks like, which someone opening their first 3D printer does not. A well-written quick-start guide with photos of good vs. bad first layers reduces support tickets by roughly 40% based on Precise3D internal data.
Nozzle-as-probe systems (strain gauge, load cell) eliminate Z-offset entirely.
Because the nozzle tip is the probe, the trigger point is the nozzle tip — there is no offset to calibrate. The printer probes the bed by lightly touching the nozzle to the surface at each grid point, and the strain gauge registers the contact force. This is the technology in the Pro X1 and is the primary reason high-end printers achieve "unbox-and-print" reliability: the single biggest calibration variable has been engineered out of existence. For a deeper discussion of how premium features compound to justify higher price points, see our distributor pricing strategy guide.
Temperature Drift: The Hidden Variable in Bed Leveling Accuracy
All probe technologies exhibit some degree of thermal drift — the trigger point shifts as the probe's internal electronics warm up. This is particularly relevant in enclosed printers where the chamber temperature rises during long prints. A probe calibrated at room temperature may trigger 0.02–0.05mm differently at 50°C chamber temperature. If the difference moves the nozzle 0.02mm closer to the bed, the first layer gets slightly over-squished but still adheres. If it moves the nozzle 0.02mm farther away, the first layer fails — and the customer doesn't understand why a printer that "worked yesterday" suddenly can't get a print to stick.
The solution is thermal compensation in firmware. Advanced systems like Klipper and Marlin 2.1+ support temperature calibration curves for probes — the printer measures the probe's trigger point at multiple temperatures and interpolates the offset. The Precise3D Pro X1's firmware re-probes 9 reference points at the start of every print regardless of the stored mesh, detecting and compensating for any thermal drift since the last full calibration. For distributors offering printers with older firmware, as covered in our Klipper firmware guide, thermal drift compensation is one of the strongest selling points for a firmware upgrade — it solves a problem the customer experiences but can't diagnose.
Customer Segment Mapping: Who Needs What Level of ABL?
Match the calibration technology to the customer, and you prevent the returns that kill margins. Here's the segment-by-segment breakdown:
First-time hobbyist ($199–299 price point):
A mechanical plunger probe with 9–16 mesh points is the correct spec. The BLTouch clone (3D Touch) at this tier is adequate — it provides enough bed compensation to deliver a good first layer on PLA, which is all this customer prints. Manual Z-offset calibration with a clear visual guide in the quick-start card is essential. The creator C1's implementation — 25-point mesh, BLTouch-style probe, assisted Z-offset wizard — is actually above-spec for this segment and serves as a competitive differentiator: the customer gets prosumer-level calibration at an entry-level price, and that translates to fewer returns and better reviews.
Enthusiast / multi-material printer ($349–599):
A quality mechanical probe (genuine BLTouch or equivalent) with 25–36 mesh points is the floor. The customer is printing PETG, TPU, and possibly their first ABS prints — materials that demand better first-layer consistency. The 25-point mesh on the Creator C1 covers this segment adequately. Distributors should bundle an extra probe pin with every printer sold at this tier — it costs under $1 and signals that you understand the product's maintenance lifecycle. For the customer's likely upgrade path, see our portfolio strategy guide.
Print farm operator ($599+):
Strain gauge or load cell, 49+ mesh points, no exceptions. A print farm with 20 printers cannot afford to have an operator manually calibrate Z-offset on every machine — the labor cost alone erases the margin advantage of multi-unit operation. The Pro X1's strain gauge system with fully automatic calibration is designed for this use case: unbox, power on, load filament, press print. Each printer self-calibrates. The operator's time goes to removing completed prints and starting new ones — not to tweaking Z-offset by 0.01mm. The economics are compelling: if manual Z-offset calibration takes 5 minutes per printer and a farm has 20 printers, that's 100 minutes per calibration cycle. At $20/hour operator cost, automatic calibration saves $33 per cycle — enough to pay for the Pro X1's premium over the Creator C1 in roughly 6 calibration cycles. These numbers are consistent with the real-world economics discussed in our print farm economics analysis.
Education / classroom ($299–799):
The calibration technology matters less than the calibration workflow. Teachers cannot spend 5 minutes per printer tweaking Z-offset at the start of every class. A mechanical probe with a good Z-offset wizard — preferably with a visual reference image of a correct first layer — is the minimum. Strain gauge systems with zero-offset calibration are ideal if the budget allows. The important feature at this tier is repeatability: the probe must produce the same result every time without drift, because if students see inconsistent results, they lose trust in the equipment and stop using it. This is one of the fastest paths to a printer gathering dust in a school storage closet.
What to Look For in Each Price Tier — A Distributor's Spec Checklist
When evaluating printer SKUs for your product line, the bed leveling system is a proxy for overall engineering quality. A manufacturer that invested in a good probe also invested in a flat bed, a rigid frame, and properly tuned firmware — because a probe can't compensate for bad hardware. Here's what to look for at each tier:
The red flags column is where margin gets protected or destroyed. A capacitive probe in a sub-$199 printer may sound like a feature, but the temperature-dependent drift means more returns than if the printer shipped with manual leveling and a good instruction video. A $599 printer with a mechanical BLTouch clone is not necessarily bad — the Creator C1 uses this exact setup and achieves excellent results — but at that price, customers will compare against inductive-probe competitors, and the spec sheet gap needs to be addressed in your sales material by emphasizing the 25-point mesh density and the Z-offset wizard rather than hiding the probe type.
For printers in the $749+ range, strain gauge is becoming the expected baseline. Bambu Lab's X1C uses a strain gauge system; Prusa's MK4 and XL use load cells; the Precise3D Pro X1 uses an integrated strain gauge. A premium printer shipping with a mechanical probe in 2026 is a signal that the manufacturer hasn't updated their toolhead design in several product generations — and that means other components (hotend, part cooling, extruder gears) are likely also dated. Our extruder comparison guide covers the related component choices in detail.
Bottom Line
The auto bed leveling probe is a $3–30 component that determines whether a $200–2,000 printer produces a usable first layer — or gets returned. The technology difference between capacitive, mechanical, and strain gauge is not subtle: it's the difference between a printer that works out of the box and one that requires 20 minutes of calibration from a first-time user who doesn't know what a good first layer looks like. For distributors, the ABL spec is one of the three highest-priority product evaluation criteria — alongside the kinematics (CoreXY vs bedslinger) and the extruder type (direct drive vs Bowden). Get these three right, and the rest of the spec sheet is optimization. At Precise3D, every printer in the lineup is designed with the correct ABL technology for its target segment: mechanical plunger for the entry and mid tiers, strain gauge for the professional tier. No capacitive probes, no manual-leveling-only SKUs. Because the first layer is the first thing a customer judges — and the probe is what makes it right.
Reviewed by the Precise3D engineering & OEM team. Compliance files that accompany the catalog are auditable at the certification register.
Start Your Partnership
Ready to Bring auto bed leveling calibration to Your Market?
Start with the auto bed leveling calibration spec sheet, then validate every claim against the certification register.
