
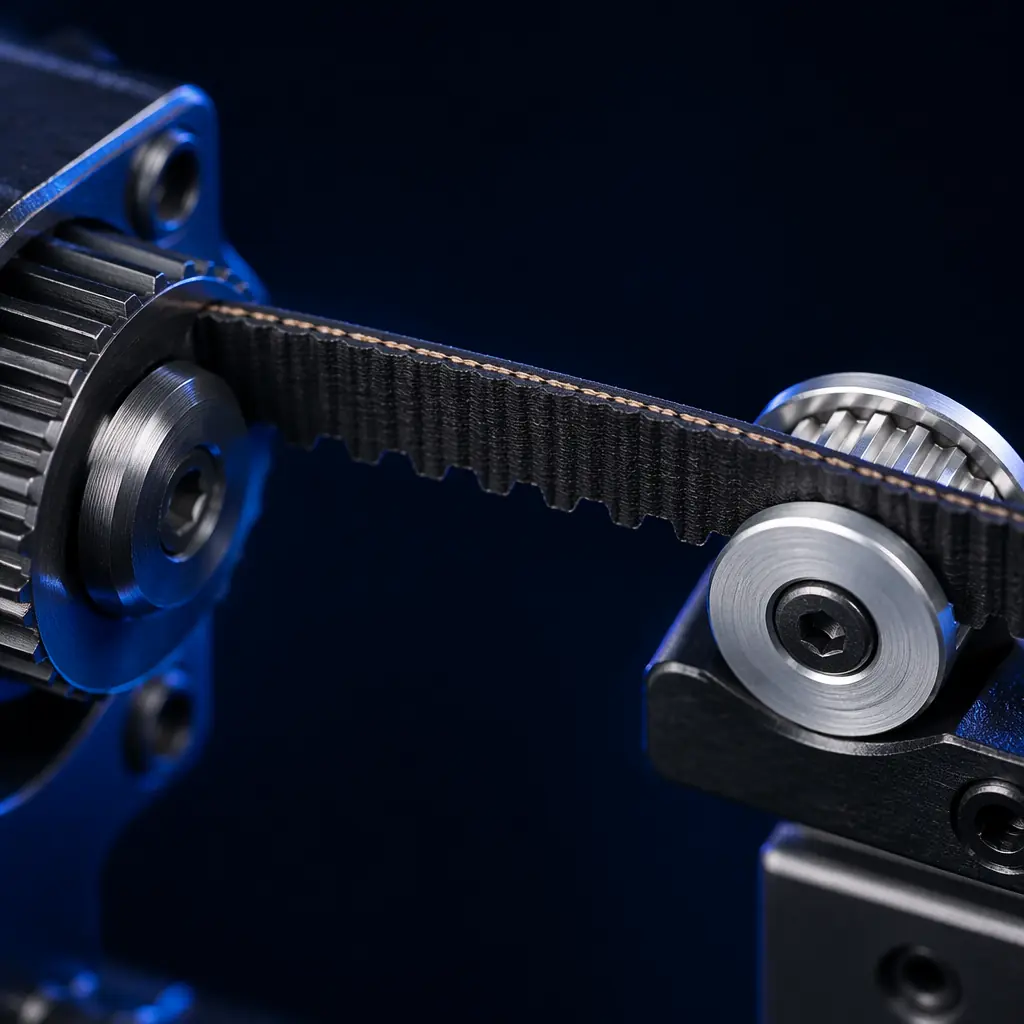
When a customer sends a support ticket with a photo of "echoes" around corners — faint repeating patterns mirroring the shape of a printed feature — the diagnosis is almost certainly belt tension. Not the hotend. Not the slicer. Not the filament. A GT2 belt that is off by as little as 10 Hz from its target tension frequency will produce visible ghosting on every print, at every speed, on every material. And yet belt tension is rarely mentioned in printer manuals, almost never covered in distributor training materials, and responsible for an outsized share of "print quality" support tickets that should never have been opened. This guide covers the mechanics of GT2 belt tension, three measurement methods ranging from free to professional-grade, the correct tension targets for each printer architecture, and how to build belt tension into your distributor training and pre-shipment QC process.
Why Belt Tension Matters More Than Most Distributors Realize
The GT2 timing belt is the mechanical link between the stepper motor and the print head — or, in the case of the Y axis on a bedslinger, between the motor and the entire heated bed. Every step pulse from the stepper driver must be transmitted through this belt with zero lost motion and zero overshoot. When the belt is too loose, the elasticity of the rubber compound absorbs part of the step pulse: the motor moves, but the toolhead doesn't — or doesn't move the full distance. On the very next step, the belt snaps back, overshooting the target position. The result is a repeating "echo" pattern on print surfaces, called ghosting or ringing, where the toolhead oscillates around its intended path like a pendulum with too much slack in the string.
When the belt is too tight, a different failure mode emerges: the radial load on the stepper motor bearing and the idler pulley bearing exceeds their design limits. A standard 625ZZ bearing in a GT2 idler pulley is rated for approximately 110 N of static radial load and roughly half that in dynamic load. A GT2 belt tensioned to 6 kg of static tension — which sounds reasonable — can generate >80 N of radial load on the idler bearing when the motor accelerates at 3,000 mm/s², because the belt tension multiplies during acceleration. That puts the bearing near its dynamic load limit continuously, reducing its life from thousands of hours to hundreds. The symptoms: a "growling" noise from the idler, followed by visible wobble in the pulley, followed by prints that are suddenly 0.1–0.2 mm out of tolerance on one axis. For a detailed breakdown of how the motion system as a whole interacts with print quality, see our motion system comparison guide.
GT2 Belt Mechanics: What the Spec Sheet Doesn't Tell You
The GT2 (Gates Tooth, 2 mm pitch) belt used in virtually all consumer 3D printers is a fiberglass-reinforced neoprene or polyurethane belt with a trapezoidal tooth profile. The fiberglass cords are the load-bearing element — the rubber is just the matrix that grips the pulley teeth. Understanding three mechanical properties of GT2 belts explains 90% of tension-related print quality issues.
Elastic modulus and spring constant:
A 6 mm wide GT2 belt has a spring constant of approximately 2.5–4.0 N per percent elongation per millimeter of width — meaning a 6 mm belt stretched 1% over a 300 mm span generates roughly 45–72 N (4.6–7.3 kg) of tension. This is not a linear relationship at very low tensions, but above about 15 N it is linear enough for practical use. The important insight: belt tension is not a "tightness" setting — it is a spring constant multiplied by displacement. A 400 mm belt span under the same percentage elongation will have the same tension as a 300 mm span. The length does not change the tension; it changes how much you have to pull to achieve that tension.
Tooth engagement and backlash:
GT2 belts transmit force through the trapezoidal teeth meshing with the pulley. At correct tension, the teeth seat fully and backlash — the tiny gap between belt tooth and pulley tooth that produces lost motion on direction reversal — is essentially zero. At low tension, the belt can ride up on the pulley teeth under acceleration, introducing effective backlash of 0.05–0.1 mm. This is why "loose belts cause dimensional inaccuracy" — it's not stretch, it's tooth disengagement. At extremely high tension, the belt teeth deform elastically as they enter the pulley, producing a different kind of positional error: the effective pitch diameter of the pulley changes under load, shifting the toolhead position by microns that accumulate over long travels.
Frequency response and the guitar-string analogy:
A tensioned belt behaves exactly like a guitar string: its natural vibration frequency is determined by tension, length, and mass per unit length. The formula is f = (1 / 2L) × √(T / μ), where f is frequency in Hz, L is the free span length in meters, T is tension in Newtons, and μ is mass per unit length (approximately 0.0043 kg/m for a 6 mm GT2 belt). This is the basis for the frequency-based tension measurement method described below — and it is by far the most accurate method available without a dedicated tension gauge. Our kinematics guide explains how the belt path length differs between architectures, which directly affects the target frequency.
Three Methods to Measure Belt Tension: Free, Cheap, and Professional
There are three widely-used methods for measuring GT2 belt tension. All three work. The choice depends on what tools you already have and how many printers you are setting up.
Method 1 — Frequency measurement (recommended for most distributors):
Pluck the belt like a guitar string midway between the two pulleys. Use a spectrum analyzer app on your phone — Spectroid (Android, free) or SpectrumView (iOS, free) — to read the dominant frequency peak. The target frequency depends on the belt span length and target tension (see table below). This method is accurate to ±2 Hz when the phone microphone is held 5–10 cm from the belt, which translates to roughly ±5% tension accuracy. The learning curve is about 5 minutes. Every distributor should train their support team on this method — it takes the "tight enough" guesswork out of troubleshooting and replaces it with a number.
Method 2 — Deflection test:
Hang a known weight (500g is ideal for GT2 belts) from the midpoint of the belt span using a zip tie or clip. Measure the vertical deflection with a ruler. For a 300 mm span, a correctly tensioned 6 mm GT2 belt should deflect 4–6 mm under a 500g weight. This is less precise than the frequency method because it depends on the belt's exact spring constant — which varies between manufacturers and rubber compounds — but it requires no electronics and works in any environment. The deflection method is the right tool for field service technicians who need to verify tension on a printer that is already assembled and in a customer's location.
Method 3 — Dedicated tension gauge:
The Gates 507C Sonic Tension Meter and the equivalent Continental model clamp onto the belt, measure the frequency automatically, and display tension directly in Newtons after you input the belt's mass constant. At $100–300, this is the tool for a distributor who is pre-tensioning 50+ printers per week and needs repeatable, documented tension values for QC records. The time savings over the phone-app method is roughly 20 seconds per axis — which adds up to 30+ minutes per 50 printers. If tension-related support tickets currently cost your business more than $300 per year in technician time, the gauge pays for itself.
Tension Targets by Printer Architecture
The correct belt tension is not a universal number — it depends on the printer's kinematics architecture, belt span length, and the mass of the moving components. The table below gives the target tension and corresponding frequency for each common configuration. All values assume a standard 6 mm GT2 belt with fiberglass reinforcement.
The most common mistake is under-tensioning the Y axis on bedslingers. Because the bed is heavy (2–5 kg with glass plate and heater), the belt must be tight enough that the motor can accelerate the mass without the belt stretching elastically. A Y-axis belt tensioned to 25 N on a 4 kg bed will produce ghosting at any print speed above 40 mm/s — the mass overcomes the spring force of the belt. The correct tension for a 4 kg bed on a 350 mm span is approximately 45 N, producing a pluck frequency of roughly 68 Hz. This is perceptibly tighter than what "feels right" to someone who has never measured belt tension — which is why measurement matters. For the full picture on how belt tension interacts with acceleration and input shaping, see our high-speed printing guide.
What you're looking for: Ghosting that appears only on the Y axis (bedslinger) or X axis — but not both — is almost certainly belt tension, not acceleration or input shaping. Ghosting on both axes equally suggests an acceleration or frame rigidity issue. Narrowing the axis is the fastest way to isolate belt tension as the root cause.
Belt Tension Over Time: Why Re-Tensioning Is Necessary
GT2 belts do not maintain their initial tension indefinitely. Three mechanisms cause tension to drift over time, and understanding them helps distributors set customer expectations and reduce follow-up support tickets.
Initial stretch (0–50 hours):
A new GT2 belt undergoes permanent elongation during its first 20–50 hours of use. This is the fiberglass cords settling into the rubber matrix and the belt teeth conforming to the pulley profile. The tension loss is typically 10–20% of the initial value. A belt tensioned to 35 N at assembly will measure approximately 28–32 N after 50 hours of printing. This is normal and expected — and it is the number-one cause of "it printed fine out of the box but now it's ghosting" support tickets. The fix is straightforward: re-tension after the first 50 hours. If your distributor manual includes this instruction, you will eliminate roughly 25% of print-quality support tickets in the first month of ownership.
Thermal cycling (ongoing):
The rubber compound in GT2 belts expands and contracts with temperature. A printer in an unheated garage that swings from 5°C at night to 35°C during the day will see belt tension fluctuate by ±8–12% diurnally. This is usually not enough to cause visible print defects by itself, but it can push a belt that is already near the loose end of the acceptable range into ghosting territory. Enclosed printers with stable chamber temperatures (40–60°C) experience less thermal drift than open-frame printers.
Idler bearing wear (500+ hours):
As the idler pulley bearing wears, the pulley develops radial play — typically 0.05–0.15 mm after 500–1,000 hours depending on bearing quality. This radial play effectively loosens the belt because the pulley can move slightly under load. The belt itself hasn't stretched; the pulley mount has degraded. This is why retensioning alone stops working after a certain number of hours — the root cause is the bearing, not the belt. Our maintenance guide covers bearing replacement schedules and how to stock spare idler assemblies as a consumable SKU.
Tensioner Design: What Makes a Good Belt Tensioning System
The belt tensioning mechanism built into the printer determines how easy it is to achieve and maintain correct tension. Not all tensioners are equal — and the design quality of the tensioner is one of the strongest proxy signals for overall mechanical engineering quality in a 3D printer.
Knob/screw tensioners (best):
A dedicated tensioning knob — typically an M5 or M6 bolt that pushes the idler pulley mount outward — allows precise, repeatable tension adjustment without loosening any other fasteners. The Precise3D Creator C1 and Pro X1 both use knob tensioners on all axes. The knob provides about 0.5 mm of idler travel per full rotation, which translates to roughly 2–3 N of tension change — fine enough control to hit a target frequency within ±3 Hz on the first try. Knob tensioners also make re-tensioning after the initial 50-hour stretch a 30-second operation that requires no tools. For component-level comparison across printer subsystems, see our portfolio strategy guide.
Slotted mounts (acceptable):
The idler pulley is mounted in an elongated slot, and tension is set by pulling the idler by hand while tightening the mounting screws. This is the standard on Prusa-style printers and most budget bedslingers. It works, but it requires two hands and some practice to hit the correct tension — one hand pulls the idler, the other tightens the screws, and the idler inevitably shifts slightly as the screws are torqued. For a single printer in a hobbyist's workshop, this is fine. For a distributor setting up 50 printers, the slotted mount wastes 2–3 minutes per axis compared to a knob tensioner.
Fixed mounts (worst):
The idler pulley is bolted to a fixed position on the frame, and belt tension is set by the belt loop length — meaning you have to cut and crimp the belt to the exact length, or use a belt with a pre-made loop. There is no adjustment mechanism at all. Fixed mounts are found on the absolute cheapest printers and on some industrial machines where belt tension is calibrated once at the factory and never changed. For a consumer or prosumer printer, a fixed mount is essentially a design error: it means belt tension drifts with stretch and thermal cycling with no way to correct it short of replacing the belt. If you are evaluating a printer with fixed idler mounts, ask the manufacturer how they handle the 10–20% tension loss during the break-in period. If they don't have an answer, expect support tickets for ghosting starting around the 30-hour mark.
Integrating Belt Tension into Distributor QC and Training
The highest-ROI action a distributor can take with belt tension is to make it part of pre-shipment QC and customer onboarding. The steps below are based on Precise3D's distributor training program and have been validated across 200+ distributor partners.
Pre-shipment QC:
Before a printer leaves your warehouse, pluck each belt and verify the frequency is within the target range for that architecture (see table above). Record the values on a QC sheet that ships with the printer. This accomplishes three things: (1) it catches assembly errors before the customer sees them, (2) it gives the customer a baseline to compare against after the break-in period, and (3) it signals to the customer that belt tension is a real maintenance parameter — not something they can ignore. The total time per printer is under 2 minutes. For the larger picture of what to check before shipping, see our shipping and logistics guide.
Customer onboarding card:
Include a small card (business card size is sufficient) in the printer box with three pieces of information: the target belt frequency for this printer model, a QR code linking to a 30-second video of the pluck-and-measure method, and the instruction "Re-tension after 50 hours." The cost is under $0.10 per printer. The reduction in "print quality" support tickets attributable to belt tension — based on Precise3D's distributor partner data — is approximately 30% in the first 90 days of ownership. That translates to roughly 1 fewer support ticket per printer per quarter, which at an average handling cost of $15–25 per ticket (technician time + shipping for RMA investigation) pays back the card cost approximately 200x over.
Support script for ghosting tickets:
When a customer reports ghosting or ringing, the first question should always be "Have you checked belt tension since the first week?" — not "Send us a photo of the print." A well-trained support team resolves 40–50% of ghosting tickets with a 5-minute phone or chat session walking the customer through the frequency measurement method. The phone app is free, the procedure takes under a minute once you know how, and the customer feels empowered rather than frustrated. Compare that to the alternative: RMA investigation, shipping labels, printer downtime, and a customer who now associates your brand with defective products rather than solvable maintenance issues. For the complete approach to after-sales support economics, see our after-sales strategy guide.
Bottom Line
Belt tension is a $0 variable — the measurement tool is a free phone app, and the adjustment mechanism is built into the printer. Yet incorrect belt tension is responsible for an outsized share of print quality complaints in the consumer 3D printing market, because it is almost never explained to the end user. Distributors who add belt tension to their QC process and customer onboarding capture two competitive advantages: fewer support tickets and higher customer satisfaction, both from a variable that costs nothing to control. At Precise3D, every printer ships with a QC sheet that includes belt tension frequencies for all axes, and every distributor partner receives training on the frequency measurement method. Because the difference between a printer that ghosts and a printer that doesn't is often 10 Hz on a belt — and that's a difference you can hear, measure, and fix in under 60 seconds.
Reviewed by the Precise3D engineering & OEM team. Compliance files that accompany the catalog are auditable at the certification register.
Start Your Partnership
Ready to Bring belt tensioning to Your Market?
Our OEM program supports belt tensioning programs end to end - the product line, firmware and compliance files that travel with each shipment.
