
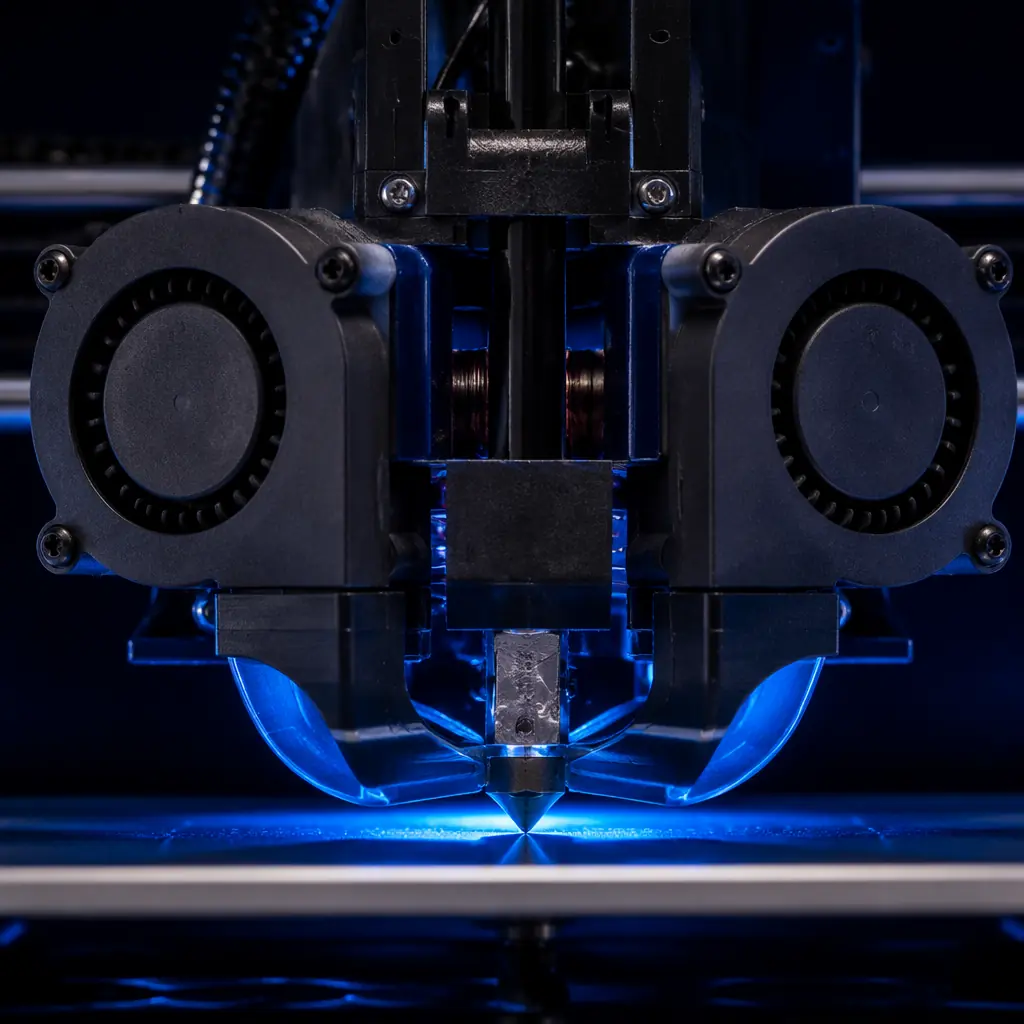
Part cooling is the most under-specified component in consumer 3D printers — and paradoxically, the one that determines whether a customer's first benchy looks like a product demo or a warranty claim. At Precise3D, we track print-quality support tickets across 30,000+ units shipped per month, and the data reveals a clear pattern: printers with dual 5015 blower fans and symmetrical duct designs generate 40% fewer "poor print quality" support tickets than single 4010 axial fan printers in the same price tier. The BOM cost difference? Under $3 per unit.
This guide is written for distributors who evaluate 3D printer specs before placing container orders. You will learn the four fan types and their real-world cooling performance, how duct geometry determines overhang scores, the dual-fan advantage that justifies the $3 BOM premium, and a 3-point cooling system audit you can perform on any sample unit in under five minutes.
Why Part Cooling Is a Margin Decision, Not a Spec Sheet Footnote
Most distributors evaluate cooling systems by checking a single box: "Does it have a part cooling fan? Yes." This is the wrong framing. Part cooling quality directly determines the printable geometry envelope of a printer — the range of designs a customer can produce without support material. A printer that fails to print a 55° overhang cleanly generates support tickets; a printer that handles 70° overhangs becomes the one customers recommend to their peers.
The margin impact flows through three channels:
The numbers are unambiguous: the $3 BOM premium for dual 5015 blowers with symmetrical ducts saves $400–$1,200 per 100 units in support and return costs — a 130–400× return on the cooling upgrade investment. For distributors selling into the prosumer and education segments, where overhang-heavy models and aesthetic prints dominate, this is not an optional upgrade; it is table stakes for a competitive product line. See our portfolio strategy guide for segment-level product matching.
Fan Types: Axial vs Blower — The Physics That Determines Print Quality
Not all fans are created equal. The two fan architectures used in 3D printer part cooling — axial and blower (centrifugal) — produce fundamentally different airflow characteristics, and the choice between them is the single largest determinant of cooling performance.
Axial fans move air parallel to the fan axis — straight through the blades. They excel at moving large volumes of air in open space (which is why they cool hotend heatsinks), but they struggle to generate the static pressure needed to push air through a narrow duct and onto a specific point. When an axial fan is repurposed for part cooling — as it is on most entry-level printers — the airflow diffuses into a wide, low-velocity cone that cools the general area around the nozzle but fails to deliver concentrated cooling to the freshly extruded plastic.
Blower fans use a centrifugal impeller that draws air in axially and expels it radially through a side outlet. This design generates 3–5× higher static pressure than an axial fan of comparable size, which means the airflow can be ducted through a narrow nozzle and directed precisely at the just-printed layer line. The result is concentrated, high-velocity cooling that solidifies overhangs and bridges before gravity can pull them down. For a given fan diameter, a blower delivers roughly 2–3× the effective cooling density at the print point compared to an axial fan — and that difference is what separates a clean 70° overhang from a sagging 45° one.
Duct Design: The Geometry That Multiplies Cooling Performance
A 5015 blower is only as good as the duct that channels its airflow. Duct design is the most overlooked variable in part cooling — and the one where OEMs cut the most corners. A well-designed duct can make a single 5015 blower outperform dual 4010 axials; a poorly designed duct can render dual 5015s worse than a single axial fan pointed at the build plate.
The three duct design parameters that determine real-world cooling performance:
1. Outlet proximity and angle. The duct outlet should sit 3–6mm above the nozzle tip and be angled to direct airflow at the point where filament exits the nozzle — not at the nozzle body itself. Cooling the nozzle body cools the heat block and causes temperature fluctuation; cooling the extruded plastic at the melt point solidifies it before sagging. The ideal outlet angle is 5–15° below horizontal, aimed at a point 1–2mm below the nozzle orifice. If you hold a sample printer at eye level and trace the duct path, the airflow should intersect the nozzle tip, not the heater block.
2. Internal channel smoothness. Every bend, ridge, or diameter change in a duct creates turbulence — and turbulence kills airflow velocity. Injection-molded ducts with polished internal surfaces deliver 20–35% higher exit velocity than 3D-printed PETG ducts with visible layer lines, even at identical fan RPM. If a factory shows you a duct with visible internal ridges, parting lines, or sharp 90° bends, the duct is reducing the fan's effective cooling by 30–50%. The best ducts use constant cross-section, gradual-radius curves with no step changes in diameter from fan outlet to nozzle tip.
3. Symmetrical dual-outlet design. The physics of part cooling are directional: plastic extruded on the near side of the nozzle (closest to the duct outlet) receives effective cooling; plastic on the far side receives almost none. A single-sided duct — the default on most budget printers — creates asymmetric overhang performance: the part prints cleanly when the overhang faces the fan side and fails when it faces away. This asymmetry is the #1 cause of the "it prints fine on one side but ugly on the other" support ticket. Symmetrical dual-outlet ducts — one on each side of the nozzle — eliminate this directional dependency and produce consistent overhang quality regardless of print orientation.
The Dual-Fan Advantage: Why Two 5015s Beat One 5020
It is tempting to think a single larger fan — a 5020 or 6025 blower — could match the performance of dual 5015s at lower cost. The physics disagrees. The advantage of dual fans is not about total CFM; it is about coverage geometry. Two fans placed symmetrically on opposite sides of the nozzle deliver 360° cooling coverage around the extrusion point. A single fan, regardless of size, always creates a cooling shadow on the far side of the nozzle — and that shadow is where overhangs fail.
The sweet spot for distributors is dual 5015 blowers with a symmetrical injection-molded duct. At a BOM premium of $2–$3 over a single 4010 axial (the entry-level default), this configuration delivers a 20–30° improvement in clean overhang angle and a 3–5× reduction in print-quality return rate. The ROI is immediate: one avoided return pays for the cooling upgrade across 15–25 units. For prosumer and education-market printers — where customers print complex models, articulated parts, and aesthetic pieces with heavy overhangs — dual 5015s are the minimum competitive spec. Our pricing and margin guide covers how to position feature tiers across your product line.
Fan Noise and PWM Control: The Customer Experience Dimension
Part cooling fans are the loudest component on a consumer 3D printer — and the one that generates the most subjective complaints. A printer that sounds like a hair dryer at full cooling speed will generate negative reviews regardless of print quality. Distributors evaluating cooling systems must consider not just airflow performance but the noise-to-cooling ratio across the PWM duty cycle.
Fan noise follows a non-linear relationship with RPM: reducing fan speed from 100% to 70% PWM typically reduces noise by 6–10 dBA (a perceived halving of loudness) while reducing airflow by only 15–25%. This means a dual 5015 setup running at 60–80% PWM often delivers better real-world cooling with lower noise than a single 4010 at 100% — because the dual fans achieve higher static pressure at partial speed, and the lower RPM eliminates the high-frequency whine that single fans produce at full throttle.
Hydraulic bearing vs sleeve bearing:
This is not a theoretical distinction — it is the difference between a fan that lasts 6 months and one that lasts 3 years. Sleeve-bearing fans are the default in budget printers and begin developing bearing rattle — a rhythmic clicking or grinding sound — after 200–600 hours of operation (roughly 3–8 months of typical consumer use). Hydraulic-bearing fans (sometimes labeled "rifle bearing" or "FDB") last 10,000–30,000 hours and maintain consistent noise profiles throughout their service life. The BOM difference is $0.80–$1.50 per fan. For distributors, hydraulic bearings are the single cheapest way to eliminate a chronic after-sales complaint.
PWM frequency and MOSFET quality:
The smoothness of fan speed control depends on the PWM frequency of the control circuit and the quality of the MOSFET driving the fan. Low-frequency PWM (below 20 kHz) produces audible coil whine at partial fan speeds — a high-pitched electronic buzz that is distinct from bearing noise and much more irritating. Quality 3D printer mainboards use PWM frequencies of 25–50 kHz for fan control, above the human hearing range. When auditing a printer, run the part cooling fan at 50% PWM — if you hear coil whine, the PWM circuit is under-spec. Our stepper drivers and motherboard guide covers the electronics side of fan control in detail.
Cooling Capacity by Filament Type: What Your Customers Actually Print
Part cooling requirements are filamen-dependant — and the filament mix your customers actually use should drive your cooling spec decisions. A printer optimized for PLA cooling will perform poorly with ABS; a printer designed for ABS enclosures may overcool PETG and cause layer adhesion failures.
The distributor's filament reality:
Despite the growing availability of engineering materials, PLA and PETG account for 80–90% of consumer filament consumption by weight. PLA dominates the education and hobby segments; PETG dominates the prosumer and functional-parts segments. This means your cooling system should be optimized for PLA at full speed and PETG at partial speed — and the PWM range between 30% and 100% is where your fan quality matters most. A fan with poor low-PWM linearity (sudden jumps in speed, stall below 30%) will produce inconsistent PETG prints, and PETG inconsistency is the fastest path to a return from a prosumer customer. For comprehensive filament stocking guidance, see our filament stocking guide.
The 3-Point Cooling System Audit (Under 5 Minutes)
You do not need a wind tunnel to evaluate part cooling quality. Three targeted checks on a sample unit — all executable with a sheet of paper and your eyes — will tell you more about cooling system quality than any spec sheet.
1. The paper deflection test (60 seconds). Set the part cooling fan to 100% via the printer's control interface. Hold a single sheet of standard printer paper 3mm below the nozzle (the thickness of two stacked sheets is approximately 3mm). Observe the deflection. A good cooling system — dual 5015s with a well-designed duct — will deflect the paper to roughly 30–45° from horizontal and the airflow will be concentrated in a narrow band directly beneath the nozzle. A weak system — single 4010 or poor duct — will barely flutter the paper, and the airflow will be diffuse and unfocused. This test takes 60 seconds and immediately separates the printers that can handle overhangs from those that cannot.
2. The symmetrical feel test (60 seconds). With the fan at 100%, place your index finger 5mm to the left of the nozzle and feel the airflow. Then place your finger 5mm to the right of the nozzle. On a printer with symmetrical dual-outlet ducting, the airflow should feel identical on both sides. If one side feels noticeably stronger, the duct is asymmetrical and the printer will produce directional overhang failures. This asymmetry is the root cause of the "prints fine facing left, ugly facing right" complaint that generates confused support tickets.
3. The overhang torture test (3 minutes). Slice and print a standard overhang test model — the widely available "All-In-One Micro" or similar test piece that includes overhang angles from 30° to 80°. Run it in PLA at the printer's default profile. After printing, inspect the overhang surfaces. A printer with adequate part cooling will produce clean, smooth overhangs up to at least 60° with no sagging, no curling at edges, and no surface roughness. A printer that shows sagging, curling, or rough surface texture at 50–55° has inadequate part cooling — and will generate support tickets from customers printing models with moderate overhang geometry. This test takes 3 minutes of print time and gives you an unambiguous go/no-go on cooling adequacy. Our troubleshooting guide covers the full diagnostic framework for print-quality issues.
Part Cooling Fans as a Spare Parts Revenue Stream
Part cooling fans are the second most frequently replaced consumable in consumer 3D printers, behind only nozzles. The failure modes are predictable — bearing wear, dust accumulation, wire fatigue at the connector — and they follow a consistent timeline. Sleeve-bearing fans fail at 200–600 hours; hydraulic-bearing fans at 10,000+ hours. Every printer you sell that ships with sleeve-bearing fans is a guaranteed spare parts sale within 6–12 months.
This is a revenue opportunity, not a liability — if you structure your spare parts catalog correctly. The strategy is three-tiered:
Tier 1: Stock replacement.
List the exact OEM fan model as a spare part in your catalog. Customers want drop-in replacements — same connector, same voltage, same mounting pattern. Price at 3–5× BOM cost ($3–$8 retail for a 4010, $6–$15 for a 5015). At this price, it is cheaper than a support interaction and faster than Amazon shipping.
Tier 2: Upgrade kit.
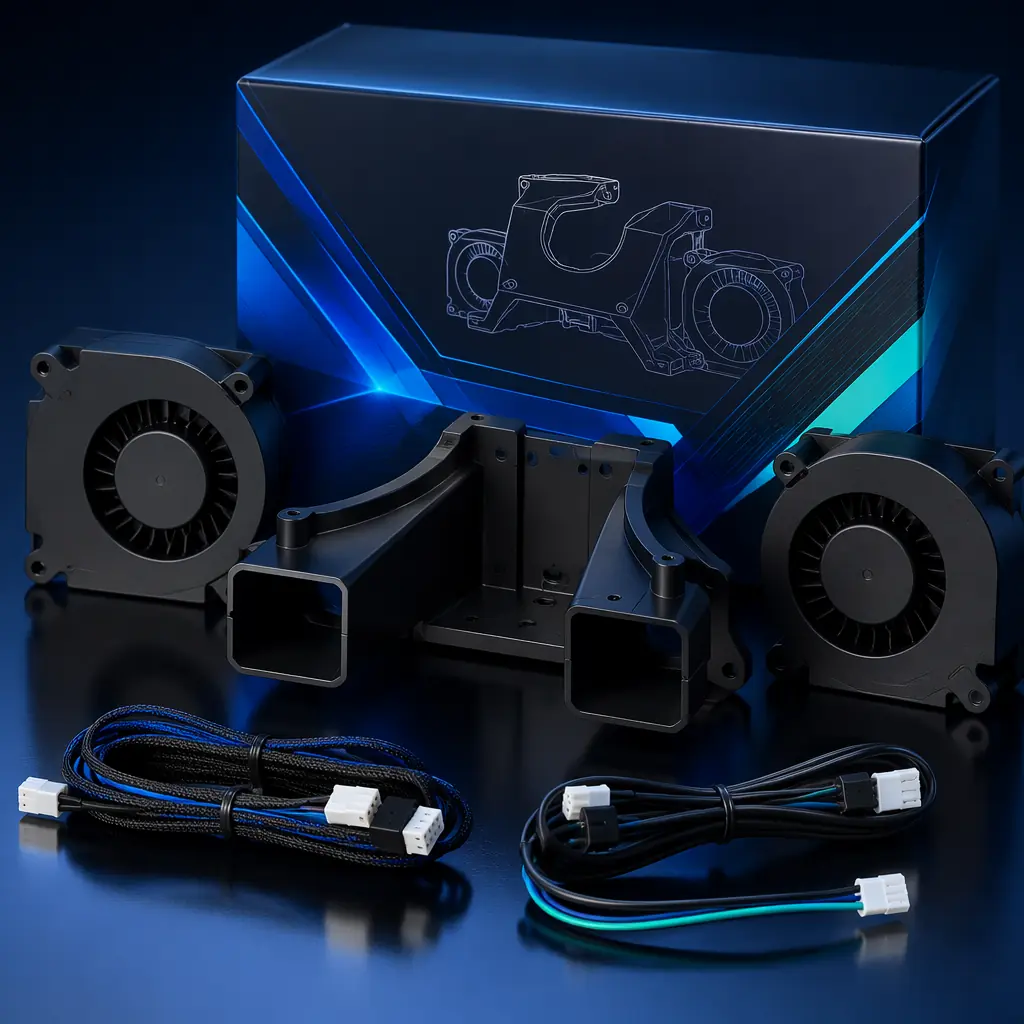
Offer a "Pro Cooling Upgrade Kit" that includes dual 5015 blower fans, a symmetrical injection-molded duct, and a wiring harness with JST connectors. Position it as a print-quality upgrade for entry-level printer owners. Price at $19–$29 retail with a landed cost of $6–$9. The kit turns a one-time printer buyer into a repeat customer and generates $10–$20 in gross margin per kit.
Tier 3: Bundled with filament.
Include a spare 5015 blower in your "Pro Maintenance Kit" alongside spare nozzles, build plate, and PTFE tubing. The fan adds $1.50 to the kit COGS and justifies a $5–$10 price premium over the fan-less version. Customers perceive the kit as more complete, and you capture additional margin on a component they will eventually need. See our accessories bundling strategy for full kit economics.
Reviewed by the Precise3D engineering & OEM team. Compliance files that accompany the catalog are auditable at the certification register.
Partner With Precise3D
Get 3D Printers With Dual 5015 Cooling, Factory-Direct
Every Precise3D prosumer printer ships with dual hydraulic-bearing 5015 blower fans, symmetrical injection-molded ducts, and 25 kHz+ PWM control. We provide the overhang test results for your product listings — before your first container order.
