
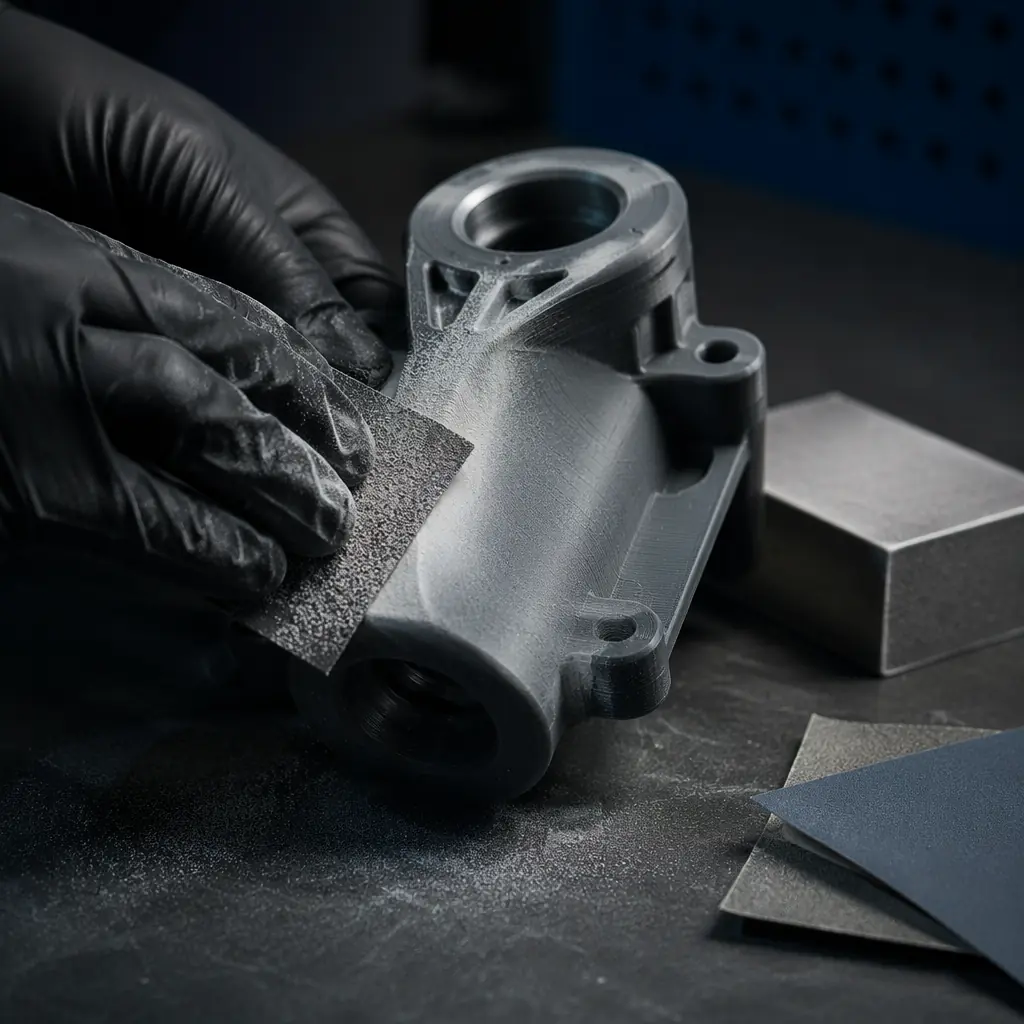
Every 3D printer distributor eventually faces the same question from a customer: "Why do my prints look like they have layer lines?" The answer is always the same — because FDM printing produces visible layer lines by design. Each 0.1–0.3mm layer creates a microscopic ridge. Stack 2,000 of them and you get a surface texture that's unmistakably 3D-printed. But here's what most distributors miss: that texture isn't a defect to apologize for. It's a revenue opportunity waiting to be unlocked. Post-processing — sanding, filling, vapor smoothing, painting, epoxy coating, and mechanical finishing — transforms a $400 printer sale into a $600 customer relationship with recurring consumable revenue attached. This guide covers every method that matters, the supplies you should stock alongside each printer tier, and the margin math that makes post-processing your most profitable accessory category.
The Post-Processing Opportunity: By the Numbers
A typical entry-level 3D printer retails for $199–249 with a 25–35% distributor margin. One spool of PLA filament adds $4–8 in margin. A post-processing starter kit — sandpaper assortment, filler primer, acrylic paint set, and a hobby knife — retails for $35–50 at 40–50% margin, generating $14–25 per kit. And unlike filament, which the customer reorders every 2–3 months, finishing supplies are consumed at a variable rate: a sandpaper sheet lasts 2–3 prints, a can of filler primer covers 8–10 medium-sized parts. The reorder cycle is measured in weeks, not months.
Scale this to a distributor with 500 active customers. If one-third buy a $40 finishing kit with a 45% margin, that's $3,000 in upfront revenue. If those same customers reorder consumables averaging $15/month at the same margin, that's $1,125 in monthly recurring revenue — $13,500/year — from accessories alone. This is the business model that filament manufacturers have understood for years, as covered in our filament stocking strategy. Post-processing supplies are the next logical extension of that model — and the margins are better because there's less price competition.
The Six Post-Processing Methods Every Distributor Should Stock For
Not every method suits every customer. The key is matching the finishing technique to the customer's use case, skill level, and willingness to invest time. Here's the full landscape, from entry-level to professional.
Sanding and Filling: The Entry Point That Every Customer Needs
Sanding is the universal post-processing method — it works on PLA, PETG, ABS, ASA, and every other thermoplastic. It requires no special equipment beyond sandpaper, a sanding block, and elbow grease. For distributors, this is the gateway consumable: every printer customer is a potential sandpaper customer.
The grit progression that works:
Start at 120–220 grit to knock down layer lines and remove any support-material nubs. Move to 400 grit for surface smoothing. Finish at 600–800 grit for a surface ready for primer. For PETG and ABS, wet-sanding at 400–800 grit produces a near-gloss finish without primer — the water prevents the plastic from overheating and gumming up the sandpaper. A well-stocked finishing kit includes 8–10 sheets each of 120, 220, 400, and 600 grit, plus a flexible sanding sponge for curved surfaces.
Filling gaps and seams:
For multi-part assemblies or prints with visible seam lines, an automotive-grade spot putty (3M Bondo or equivalent) fills gaps in seconds, sands smooth in minutes, and takes paint identically to the surrounding plastic. One 4.5oz tube costs $6–8 wholesale and covers 15–20 medium repairs. Wood filler works for PLA and is cheaper, but it shrinks as it dries — plan for two applications on gaps deeper than 1mm. Our maintenance guide covers the tool-care side of keeping sanding blocks and files in rotation.
Vapor Smoothing: The ABS/ASA Premium Finish That Commands a Price Premium
Vapor smoothing is the closest thing to magic in FDM post-processing. Expose an ABS or ASA print to acetone vapor in a sealed chamber for 10–30 minutes, and the surface literally melts and reflows — layer lines vanish, the part develops a glossy injection-molded appearance, and dimensional accuracy stays within 0.1–0.2mm. The process works because acetone is a solvent for ABS: the vapor condenses on the surface, dissolves the outermost 5–20 microns of plastic, and surface tension pulls it smooth before the acetone evaporates.
The safety equation:
Acetone is flammable and its vapor is heavier than air — it pools at floor level. Vapor smoothing must be done in a well-ventilated space, away from ignition sources. For distributors, this means every vapor-smoothing kit must include a safety sheet and a recommendation for a dedicated workspace. The upside: a vapor-smoothed part sells for 30–50% more than an unsmoothed equivalent on Etsy, eBay, and craft marketplaces. For print-farm operators running ABS production parts — a segment we analyzed in our print farm economics breakdown — vapor smoothing is the difference between a commodity part sold at cost and a finished product sold at margin.
What to stock:
1-liter acetone bottles ($3–5 wholesale), a borosilicate glass chamber or polished aluminum vapor-smoothing station ($40–80), nitrile gloves, and a respirator rated for organic vapors. The consumable cost per smoothed part is under $0.25 — the value added is $5–15 depending on part size. That's a 20–60x return on consumables, which makes it the easiest upsell you'll ever pitch to a customer printing ABS.
Priming and Painting: From Prototype to Product in Under an Hour
Nothing transforms a print's perceived value faster than paint. A sanded-and-primed PLA part painted with acrylics and clear-coated looks indistinguishable from a mass-manufactured product at arm's length. For cosplay, props, display models, and consumer products, painting is the finishing step that turns "I made this on a 3D printer" into "where did you buy that?"
The three-layer system that works:
Layer one is filler primer — a high-build spray primer (Rust-Oleum 2-in-1 Filler & Sandable or equivalent) that fills remaining layer lines and provides a uniform base. Two light coats, 10 minutes apart, then sand at 800–1000 grit. Layer two is color — acrylic spray paint or airbrush acrylic, applied in 2–3 thin coats. Layer three is clear coat — matte, satin, or gloss depending on the desired finish, applied in 1–2 coats. Total materials cost per medium-sized part: $3–6. Total time: 45–90 minutes including drying between coats.
Stocking for painters:
A basic painting kit includes one can each of gray filler primer, white primer, and matte clear coat ($4–6 wholesale each), plus a basic acrylic paint set ($8–12). The high-margin upsell is airbrush equipment: a single-action airbrush kit with compressor retails at $80–120 with 40–50% margin, and the recurring consumable is acrylic thinner and paint — $5–8 per bottle, reordered monthly by active users. For the engineering-materials customer who needs chemical resistance, our engineering filaments guide covers which materials accept which paint chemistries.
Epoxy and Resin Coating: The Professional's Choice for Functional Parts
For parts that need to be waterproof, chemically resistant, or subjected to mechanical wear, epoxy coating is the answer — and it's a method that very few consumer 3D printing distributors actively support. That's the opportunity: you can be the distributor who teaches customers how to finish functional parts, not just cosmetic ones.
Two-part epoxy coating:
Mix equal parts resin and hardener, brush onto the sanded print, and let cure for 12–24 hours. The result is a hard, clear, waterproof shell approximately 0.2–0.5mm thick. XTC-3D by Smooth-On is the category standard — it's formulated specifically for 3D prints, self-levels to fill layer lines, and cures to a glass-smooth finish. Wholesale cost is roughly $18 per 24oz kit, which covers 15–20 medium-sized parts. Retail at $28–32 with a 35–40% margin. This is the finishing method used by professional cosplayers, prop makers, and product designers who need their prototypes to survive handling.
UV-cure resin coating:
Faster than epoxy but less durable — brush on a thin layer of UV resin (the same resin used in SLA/DLP printing), then cure under a UV lamp for 2–5 minutes. The finish is glossy and hard, comparable to a clear coat, and the process is fast enough for production-line use. UV resin costs $25–35 per liter wholesale; one liter coats 30–40 medium parts at roughly $0.80 per part. Pair this with a $25 UV curing lamp and you have a $50–60 bundle with strong reorder potential on the resin. For distributors also carrying resin printers, as explored in our resin printer distribution analysis, the UV resin overlap between printing and finishing creates a natural cross-sell.
Mechanical Finishing: Tumbling and Media Blasting at Scale
For print farms and production environments — which we analyzed in depth in our print farm economics guide — manual sanding doesn't scale. Enter vibratory tumbling: load parts into a bowl with ceramic or plastic media, turn on the vibratory motor, and walk away for 2–6 hours. The media abrades the surface uniformly, rounding sharp edges and smoothing layer lines without human intervention. A benchtop vibratory tumbler costs $150–250 and processes 2–5 liters of parts per batch. The consumable is the media itself — ceramic triangles ($8–12 per kg, lasts 20–30 batches depending on part material) and liquid compound ($15 per liter, used at 30–50ml per batch).
Media blasting:
For the fastest turnaround, a sandblasting cabinet with 100–220 grit aluminum oxide media strips layer lines from PLA and PETG in 30–60 seconds per part. The capital cost is higher — $200–400 for a benchtop blasting cabinet plus a compressor — but the throughput is unmatched. This is print-farm territory, not hobbyist territory. Distributors who serve print-farm customers should stock aluminum oxide media ($25–35 per 5kg) and replacement blasting gun nozzles ($10–15). The total consumable cost per part is under $0.10.
Building a Post-Processing Supply Bundle: Three Tiers for Three Customer Segments
The most effective way to sell finishing supplies is to bundle them by customer type. A hobbyist buying their first printer doesn't need a sandblasting cabinet. A print farm doesn't need a starter kit. Here's a three-tier bundling strategy that maps to the Precise3D product line and maximizes attachment rate.
Starter Kit ($35 retail, 45% margin):
Sandpaper assortment (120/220/400/600 grit, 2 sheets each), flexible sanding sponge, hobby knife with 5 replacement blades, needle file set (5 shapes), and a printed finishing guide. This kit covers the basics — layer-line removal, support-material cleanup, and surface prep for painting. It attaches to 40–50% of first-time printer buyers.
Enthusiast Kit ($75 retail, 42% margin):
Everything in the starter kit, plus gray filler primer, matte clear coat, spot putty, acrylic paint set (12 colors), and 3 fine-detail brushes. This kit enables the full sand-fill-prime-paint workflow and attaches to 25–30% of mid-tier printer buyers — especially those who mention cosplay, props, or display models in their purchase conversation.
Professional Kit ($195 retail, 38% margin):
Everything in the enthusiast kit, plus an XTC-3D epoxy coating kit (24oz), acetone for vapor smoothing (1L), vapor-smoothing glass chamber, nitrile gloves, and organic vapor respirator. This kit enables every finishing method in this guide and attaches to 15–20% of Pro X1 buyers — the segment that prints ABS, ASA, and engineering materials. The lower margin percentage is offset by the higher absolute dollar margin: $74 per kit versus $16 for the starter kit.
For new distributors structuring their initial product mix, see our distributor startup guide, which covers the full inventory planning process including accessory SKU strategy.
Margin Analysis: Why Finishing Supplies Beat Filament
Let's compare the recurring revenue potential of filament versus finishing supplies for a distributor with 500 active customers, assuming 60% buy filament and 35% buy finishing supplies:
Finishing supplies contribute an additional 56% on top of filament revenue — and the customer acquisition cost is zero because you're already shipping them printers. The bundling strategy converts a one-time printer sale into a relationship that generates margin every month. And unlike filament, where customers can price-shop across dozens of online retailers, finishing supplies benefit from the "I need it with my next print" urgency that makes your store the default source.
For a deeper look at how printer motion-system quality affects the finishing workload — a printer with linear rails produces smoother surfaces right off the build plate, reducing sanding time by 30–40% — see our motion system comparison. The quality of the printer itself is the first variable in the finishing equation; better hardware means less post-processing.
Training and Support: The Distributor's Competitive Moat
Anyone can sell a spool of PLA. Few distributors can teach a customer how to vapor-smooth an ABS print to a mirror finish, or how to wet-sand PETG without gumming up the sandpaper. Expertise is your competitive moat — and the barrier to entry is a weekend of practice plus a well-organized knowledge base.
What to build:
Create a one-page finishing cheat sheet for each method — grit progression for sanding, safety checklist for vapor smoothing, spray distance and drying times for painting, mix ratios for epoxy. Print it on card stock and include it with every finishing kit. Record a 5-minute video for each method showing the process on a Precise3D-printed part. Host these on your site or YouTube channel and link them in your post-purchase email sequence. The goal is to make your customers successful with finishing — because a customer who produces beautiful finished prints is a customer who buys more printers, more filament, and more finishing supplies. The lifetime value compounding is real.
One final thought: the post-processing conversation starts at the printer sale, not after it. When a customer asks "which printer should I buy?", the question should trigger a follow-up: "what do you want the finished product to look like?" That question leads naturally to the finishing kit recommendation, and it positions you as a solutions provider rather than a box-mover. In a market where 3D printers are increasingly commoditized, the value isn't in the machine — it's in what the customer can produce with it.
Reviewed by the Precise3D engineering & OEM team. Compliance files that accompany the catalog are auditable at the certification register.
Start Your Partnership
Ready to Bring post processing finishing to Your Market?
Our OEM program supports post processing finishing programs end to end - the product line, firmware and compliance files that travel with each shipment.
